With the latest update for Gmail on Android devices it is now possible to modify or set custom ringtones for different Gmail labels.
Creating a custom ringtone for a label allows users to identify individual emails based on the label they fall under. It is similar to setting ringtones on your mobile phone for different persons on your contact list.
For example, in your Gmail ID, you can create three labels – one for mail from office, another for mail from family and a third one for friends, and you can set a different ringtone for all three labels.
Before we tell you how to create custom ringtones for labels there are a couple of things you should keep in mind:
First and foremost make sure that you have an Android device with OS version 2.2 or newer. Then, update the Gmail application to version 2.3.5. Then you need to create custom labels on your Gmail account.
Once you have created a label make sure to create a filter for Gmail to identify and sort mails on the basis of that label.
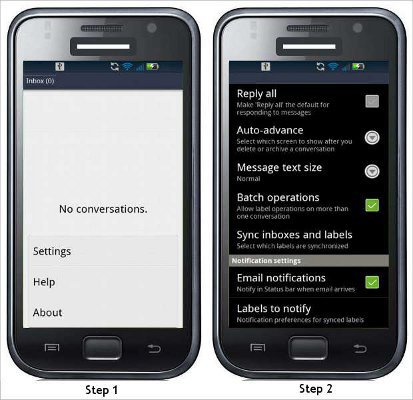
Step 1
Open the Gmail application on your Android device and navigate to application ‘Settings’. These settings can be accessed by clicking on ‘Menu’ and selecting ‘More’ following that.
Step 2
Once you are inside the ‘Settings’ tab scroll down and locate ‘Sync inboxes and Labels’, and select that option.
Note: If you have more than one Gmail account configured on the device, select the desired Gmail account before proceeding to Step 2.
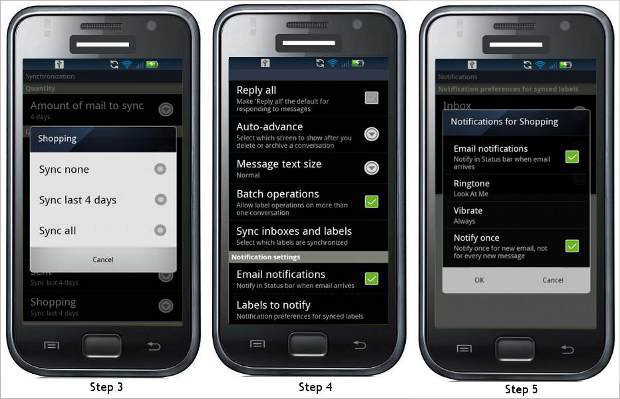
Step 3
The next page will showcase the different labels that you have configured for your Gmail account. Select the desired label and setup the sync option for it. Of the three options, select the one most suited to your need. This would not affect your emails.
You can choose to sync mails from the past four days onward, or all the mails present under the label.
Step 4
Once you are done with sync settings exit the ‘Sync inboxes and Labels’ tab and scroll further down to the ‘Labels to notify tab’.
Step 5
Here you will see the list of labels you have selected for the Gmail account. Select the desired label and it will open up the window that will allow you to tweak settings for that label.
You then have to select the email notifications tab, which will highlight the ring tone and vibrate options. Here you can chose the desired ring tone or notification tone for particular labels. Once this is done, quit the menu.
It is advised that you restart the device once to let it adjust to the new settings. Even if you don’t do this though, the device will function perfectly.