Sony has been in real jittery pertaining to the launch of the Gingerbread upgrade for its Xperia X10 smartphones, but finally it is official and soon users here in India will be getting notifications related to the upgrade for the device upgrade. Internationally, the upgrade was provided over the air but here in India no such provision is there and moreover Sony has decided to provide the update first to non network locked handsets only.
So grab your copy of the PC companion suite from Sony Ericsson’s website and follow the simple steps once you get the update notification.
Before you plan to upgrade your Xperia X10, make sure you have fully charged your device and taken the backup of your device in terms of contacts, pictures and any file that is on the device. It is suggested that you take out the Memory card as well.
Step 1
Download and install PC companion for Sony Ericsson’s website. You can also download the software using this link.
Once installed, start the program and connect your device. The software will take some time to recognise your device.
Step 2
Once the device is recognised, the software will prompt you with the details and the estimated time that will be taken by the update.
If the update is not available for your device yet then the software will prompt you that “Your device is up to date” – if you get such a message, repeat the process after sometime.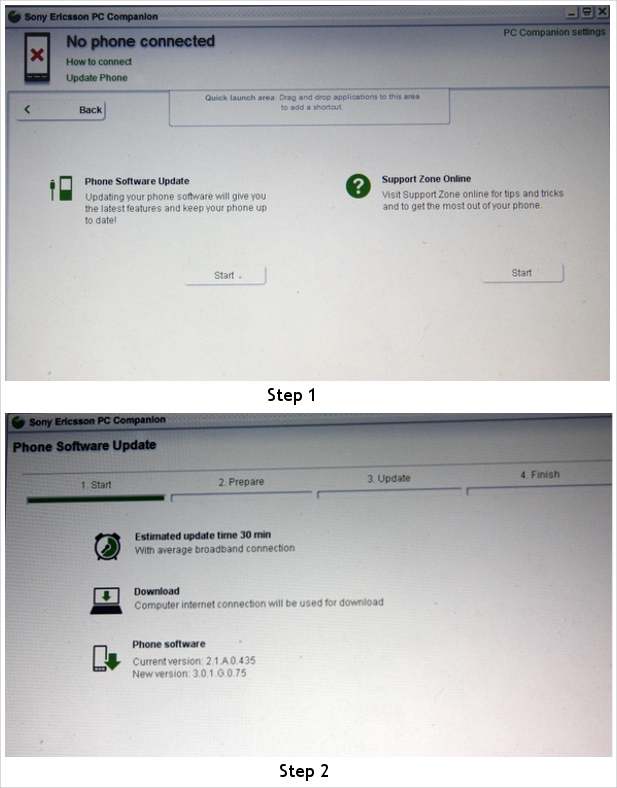
Step 3
The prompt will also show you the current software version of your device and the version to which the device will be upgraded to. After making sure of the details press next.
Step 4
The following screen will prompt you that all the data on the device will be formatted during this process. Please make sure that you have taken the backup as the phone will be restored to factory condition and no data will be left in it. If you haven’t taken a backup, take a backup and start again. If you have taken a backup already press next.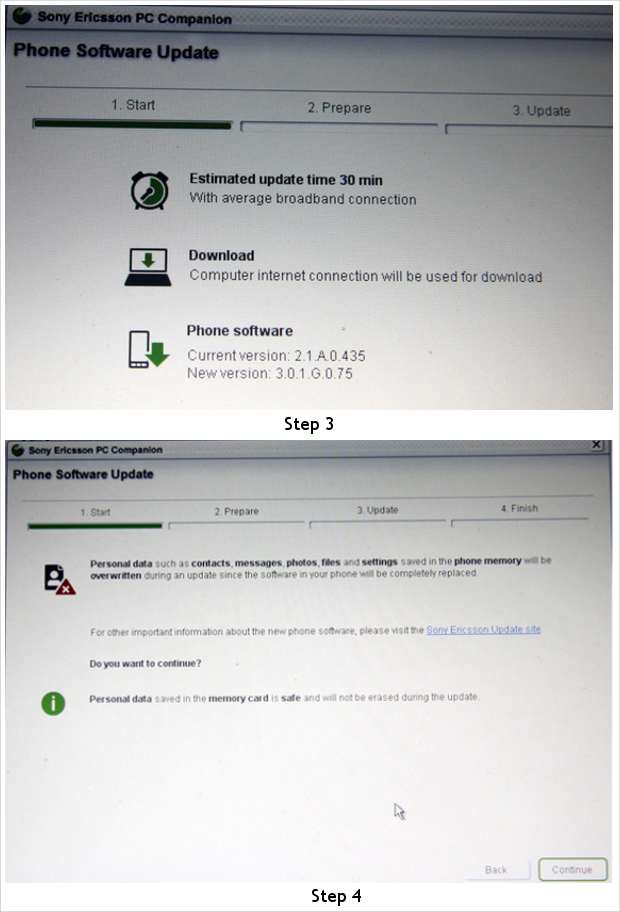
Step 5
After pressing next the software will take some time to prepare the computer for the upgrade. This includes software download and file decompression on the computer. Firstly, it will download the files from the internet.
Step 6
After the download completes, the software will decompress the files as mentioned earlier. Be patient as a lot depends on the speed on the computer and the internet connection as well. The whole process can take well more than 15 minutes.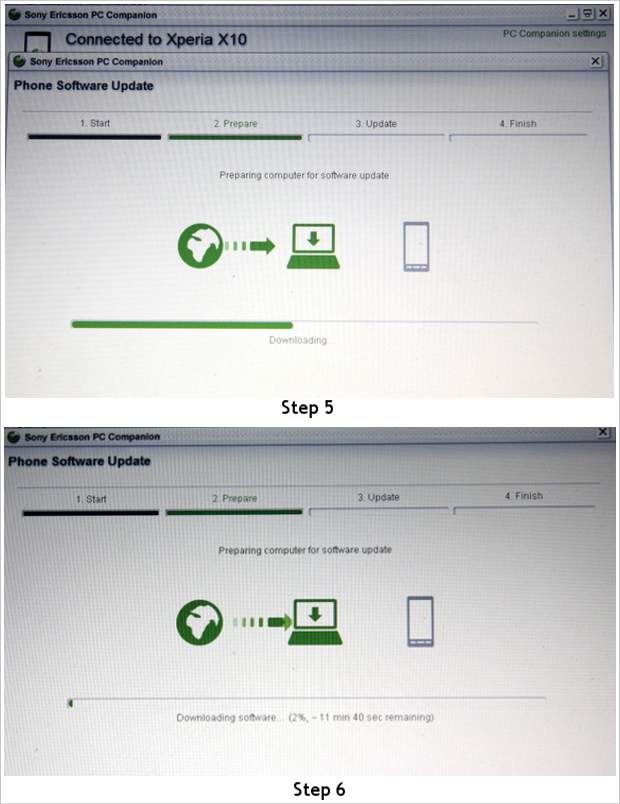
Step 7
Once the necessary preparations are done, the computer will prompt you to disconnect the device and turn the smartphone off. After the Xperia X10 is turned off, all you need to do is to reconnect the device to the computer while keeping the “Return” key pressed. If you fail to do it properly, repeat the step 7 again.
Step 8
Once the Xperia X10 gets in the update mode the software will start with the upgrade process. Be patient and let the software do its job. The whole process might take up to 30 minutes to finish and the computer might also seem that it has frozen but under no circumstances turn of the computer or unplug the device or you might destroy it completely.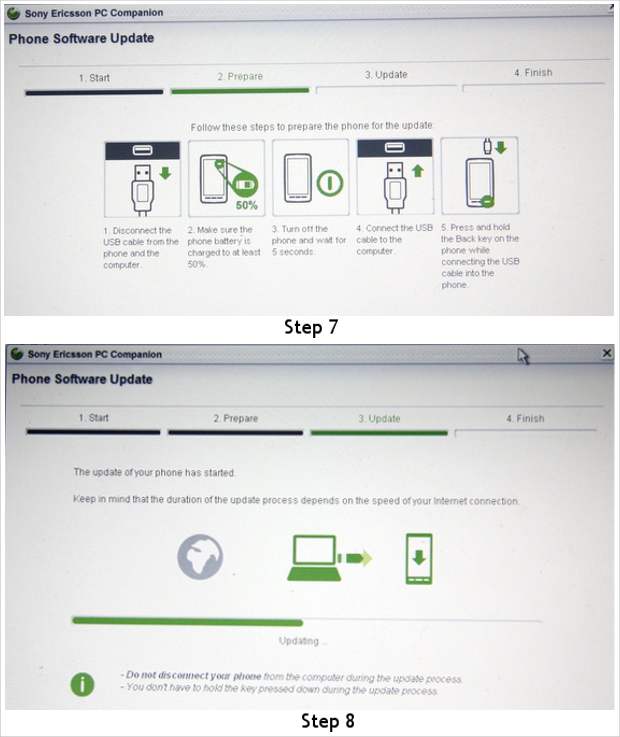
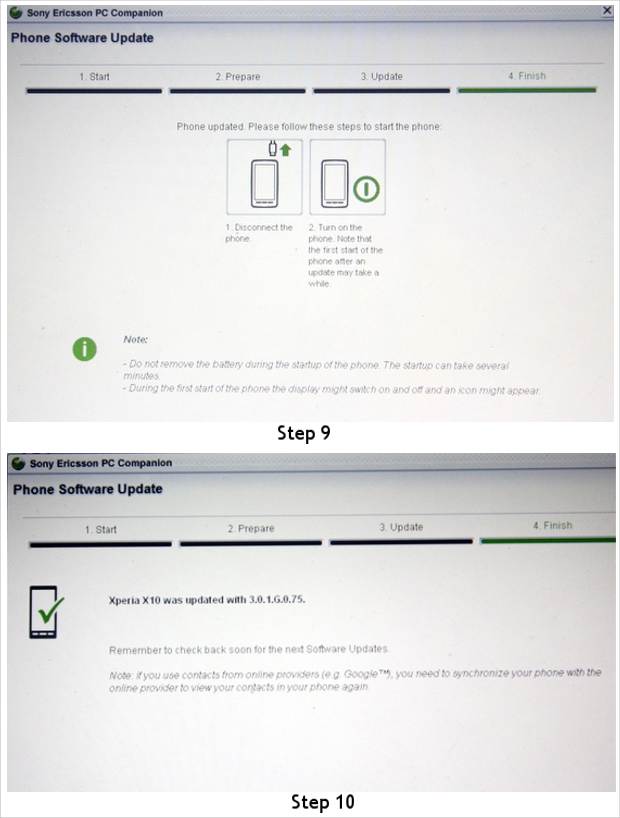
Step 9
As soon as the update completes successfully, the software will prompt you to unplug and start the device. Again be patient as it might take a while to start the phone since it will be its first start up after update.
Step: 10
The software will prompt you that you have successfully upgraded your Xperia X10. Congratulations.