
Even though there are hundreds of options available for corporate emailing these days, many organisations still trust and rely on Microsoft for all such needs, probably due to Windows being the most ubiquitous.
Android devices are fully integrated with Google solutions like Gmail and can be used to access other services as well. Microsoft Mail Exchange is a widely used email, calendar and contact service and it is also possible to sync your Android device to the service.
The steps below will tell you how to get Microsoft Exchange on your Android smartphone.
Basic requirements: Make sure you have an Android device running OS 2.2 or better and that you write down necessary details like the exchange server’s user name, Password and server location.
Step 1
On your Android device press the Applications home key. It is generally located in the lower middle portion of the screen.
Step 2
Once the Applications home screen opens, locate the mail application icon and press it.
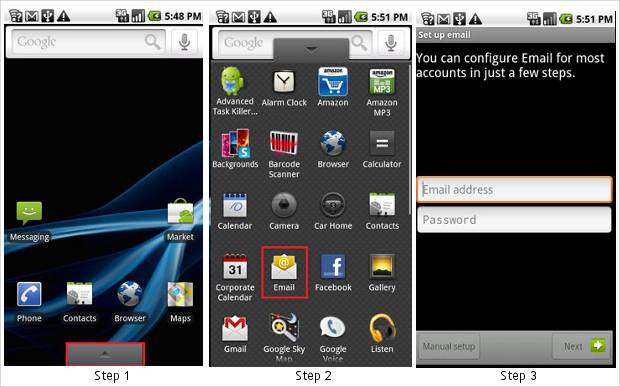
Step 3
For newer devices the application will open on a blank page asking for your login credentials for setting up a new mail account. Enter the complete email address and password and press Next.
If you have already configured some other email account, you will have to replace the email with the new one by selecting Delete from the options menu and repeating Step 3.
Step 4
Once the credentials are entered the screen prompts you to choose the type of email account. Select Exchange Account from the given options.
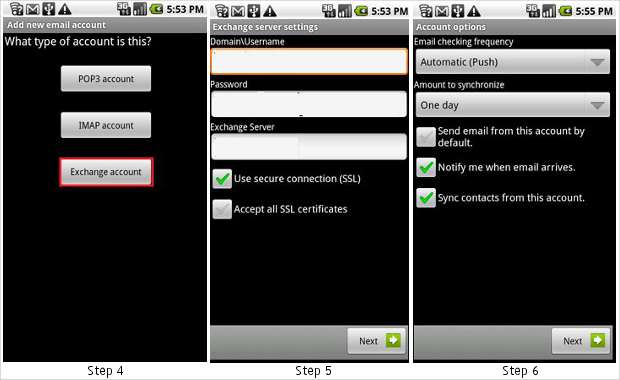
Step 5
The next screen will again ask for your credentials; usually the username and password that were entered on the welcome screen are automatically copied here, but if they aren’t you will have to type them in.
Along with the credentials, the prompt will also ask you for the domain address or Exchange server details (example: mail@xyzcorp.com). If you do not have the details you will have to contact your company’s IT administrator for them.
MS Exchange uses SSL encryption, so do not forget to select that from the given choices and then press Next.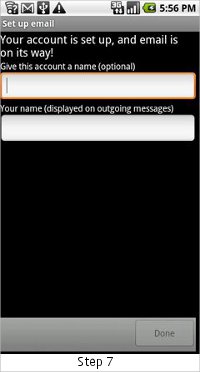
Step 6
The next screen will help you customise your phone’s behaviour in terms of notifications, sync Frequency and other options. Make these choices carefully. If something goes wrong or you wish to change it later just go to the Settings menu, select Edit and make the desired changes. Then press Next.
Step 7
The next screen will ask for a name that you wish to give to your mail account on the smartphone and your name as it will appear in outgoing messages sent from the device. Fill in the details and press Done.
The device will take some 5-10 minutes to sync messages and contacts from the Exchange server, be patient.