With the rise of social networking and image based blogging, it is becoming increasingly important to safeguard one’s privacy and identity. Social networking websites automatically help the users do that with their inbuilt security but images that are posted on other places are publically available and can be a source of problem as well.
What have been seen is that many users try to crop the images so they are not visible in the picture but cropping also takes away relevant and sometime crucial information or bits from the images.
So what is the solution? Well, there is one ‘Obscura Cam’ App that can help you anonymise your pictures so that your identity remains protected without damaging the image.
Anonymisation is a simple process of hiding or modifying someone’s identity from a picture so that the person is no longer recognisable.
So let’s check out how you can anonymise your pictures on your Android device using Obscura cam.
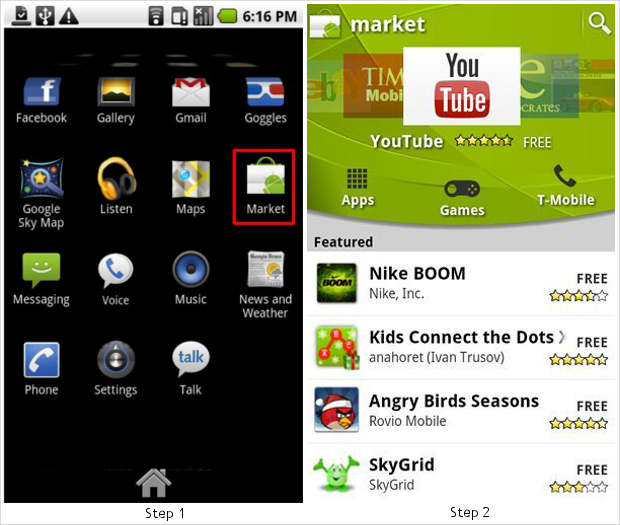
Step 1
Access the Google Android marketplace application from within your phone’s application menu.
Step 2
Once the application opens up, try locating the application under the utilities tab. You can also use the search widget of the application to search the Obscura Cam application located on the upper right hand side of the screen. Alternatively use this link to locate the application and install it.
This is a free to use ad free application but again from security point of view make sure to read the permissions asked by any application.
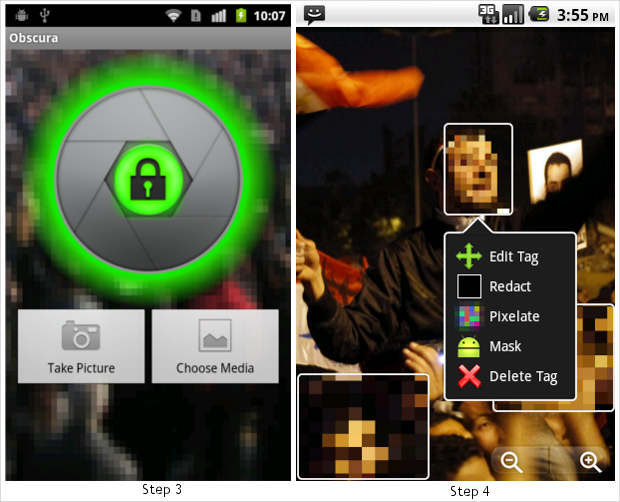
Step 3
After installation, start the application or run the application. The application will open up to the main splash screen that has two main keys including take picture and open media tab, select the suitable option to anonymise.
Step 4
You can either click a fresh picture using the phone’s camera or you can open any existing picture in the application. The application automatically recognises the faces in the picture and creates a tag box around them. Users can choose which face to anonymise and how by selecting or clicking on the tag box.
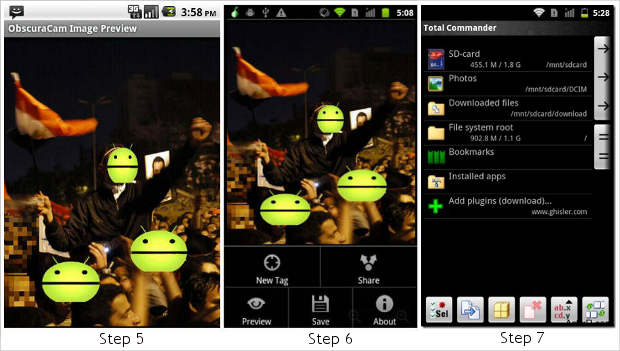
Step 5
Once done with the anonymisation, the app will automatically show you the preview of the picture for review.
Step 6
If you are happy with the results, then you can choose to either save the picture on the device or alternatively you can make corrections to the picture or add more tags by re selecting the picture. The application also allows users to post the picture directly on social networking websites right from within the application or to other devices using Bluetooth as well under the share menu.
Step 7
Users can directly upload the pictures through the desired software or can also locate the pictures in the image gallery or can also make use of any third party file explorer software to locate picture on the device.